Deploy a sample app to Kubernetes
In the previous post I installed Rancher Desktop to try out an alternative to Docker Desktop on the Mac.
Along with a Kubernetes cluster, that installs a range of useful tools including the Kubernetes command-line tool called kubectl. I’ll now that to deploy a sample app.
This post will use imperative commands which is not recommended for production applications!
kubectl
First, check you have kubectl and that it is in your PATH. Rancher Desktop should have installed it for you. Open a Terminal window and try running it:
$ kubectl --help
kubectl controls the Kubernetes cluster manager.

Find more information at: https://kubernetes.io/docs/reference/kubectl/

...
If you instead see:
-bash: kubectl: command not found
… then kubectl was either not installed correctly or it has not been added to your PATH. You could try running which kubectl to see which is the case. I’d recommend checking the Rancher Desktop documentation for guidance.
Assuming you have kubectl, next check your Kubernetes node is up and running:
$ kubectl get nodes
NAME                   STATUS   ROLES                  AGE     VERSION
lima-rancher-desktop   Ready    control-plane,master   2d22h   v1.25.4+k3s1
If all is well, Rancher Desktop should have started this for you. It should show as Ready and confirm the version of Kubernetes.
Note: If you want to see more information about it, you can use the -o wide flag. So the command would become kubectl get nodes -o wide. For this command, that would show additional columns such as INTERNAL-IP.
Sample app
I needed some kind of application to run 🤔. I figured I’d use a common demo app: the nginx web server. But I’ll make a small modification to confirm it was indeed my container being run: I’ll use a custom index.html file. So in my Terminal, I’ll create that:
$ mkdir sample-nginx
$ cd sample-nginx
$ vi index.html
i
<!DOCTYPE html>
<html lang="en">
<head>
    <meta charset="UTF-8">
    <title>Hello world!</title>
</head>
<body>
    <h1>Hello world!</h1>
</body>
</html>
Esc
:wq
I will need to containerize this applicaton. I’ll do that using a simple Dockerfile. That specifies the base image and says to replace its default index.html file with my custom one. So again, using the vi editor/commands:
$ vi Dockerfile
i
FROM nginx:alpine
COPY index.html /usr/share/nginx/html/index.html
Esc
:wq
Now I have an index.html, and a Dockerfile to describe how to build an image of my app. I now need to build that image.
Build an image
Note: Recall from the previous post that Rancher Desktop installs nerdctl as the open source alternative to the docker command. You may need to login using nerdctl login in order to authenticate requests to the Docker registry.
From the directory the Dockerfile is in run:
$ nerdctl build -t sample-nginx .
That triggers a build tagged sample-nginx:latest. It outputs a series of lines:
 => [internal] load build definition from Dockerfile   0.1s
 => => transferring dockerfile: 104B
 ...
It should only take a few seconds. I’ll see if that worked:
$ nerdctl images
REPOSITORY      TAG       IMAGE ID        CREATED          PLATFORM       SIZE        BLOB SIZE
sample-nginx    latest    0c1234567890    3 minutes ago    linux/amd64    26.4 MiB    9.8 MiB
Great! I have an image of my app.
Run the app
To check it works, I’ll first try running a single container without Kubernetes. The public nginx image documents it listens on port 80. Ports below 1024 are privileged and so to avoid needing to add complexity or run as root, I’ll use a port greater than 1024. A common choice is 8080:
$ nerdctl run --rm -it -p 8080:80 sample-nginx:latest
Note: That -it flag runs it in interactive mode and so the output is shown within the terminal. You could instead use -d which would avoid that. The --rm flag means the container will be removed when it’s stopped, which is fine.
So in the browser it should now be possible to request http://localhost:8080:
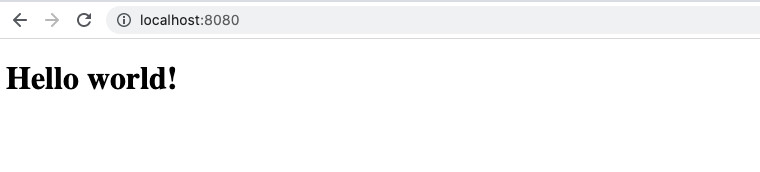
It works! Since I’m running the container in interactive mode, the request shows in the redirected access log returned by nginx:
... "GET / HTTP/1.1" 200 156 "-"
Now that I know my app runs I’ll press Ctrl+C to stop it. The container will shut down and be removed. That image can now be run anywhere.
Use Kubernetes
I now want to run my sample app on Kubernetes. Kubernetes is a container orchestration platform. It can run multiple replicas of this container. It can self-heal, restart containers that fail, reschdule containers when nodes die … and lots more.
I could create a Deployment. A Deployment creates one or more pods (the default is one). A pod is the smallest unit of computing within Kubernetes. It’s essentially a group of one (or more) containers, along with information (the specification) about how to run the container(s).
But I’ll use the kubectl run command since that is probably the simplest way to create and run an image in a pod.
I’ll do that using imperative commands. That’s the easiest way to get started. It means creating resources using the command line against the cluster. This approach isn’t recommended for production applications. In my subsequent blog post I’ll describe a better way, using a declarative configuration. But it’s fine for now.
Ok, so with kubectl I can run it:
$ kubectl run sample-nginx-test --image=sample-nginx:latest --port=80
pod/sample-nginx-test created
That looks promising. It created a pod. But is the container running?
$ kubectl get pods
NAME                READY   STATUS         RESTARTS   AGE
sample-nginx-test   0/1     ErrImagePull   0          2m2s
Oh. It’s not running 😕. It seems it could not fetch my application’s image.
Note: If you don’t know why, try running kubectl get events. That can be very helpful to see recent messages about what went wrong.
If I’d used a public image (like nginx) that error would not have happened. As that nginx image is available (or at least it should be, assuming there are no issues with the remote registry). So … why can’t it pull my custom version of that image?
That could be due to an authentication error. If the registry is private you may need to take a look at how to pull an image from a private registry.
For me, the reason is that the image I built locally needs to be loaded into Kubernetes using an additional flag: --namespace=k8s.io. Namespaces keep resources separate. So I’ll build a new image. I’m still in the same directory (the one with the indx.html and Dockerfile) and so this time I’ll run:
$ nerdctl --namespace=k8s.io build -t sample-nginx-k8s .
… giving it a new name to differentiate it from the prior image. Again, I’ll check that worked:
$ nerdctl images
REPOSITORY      TAG       IMAGE ID        CREATED           PLATFORM       SIZE        BLOB SIZE
sample-nginx    latest    0c1234567890    5 minutes ago    linux/amd64    26.4 MiB    9.8 Mi
Oh. It’s not there. That’s my old one - the one I created earlier. So … where is the one I just made 🤔.
The answer: it’s in a different namespace:
$ nerdctl images --namespace=k8s.io
REPOSITORY          TAG        IMAGE ID        CREATED           PLATFORM       SIZE         BLOB SIZE
sample-nginx-k8s    latest     0c1234567890    30 seconds ago    linux/amd64    26.4 MiB     9.8 MiB
There it is! So now my local Kubernetes cluster should be able to fetch that. Let’s see. I’ll delete that prior (failed) pod:
$ kubectl delete pod sample-nginx-test
pod "sample-nginx-test" deleted
Now I’ll try the app again, using that new local image (within the Kubernetes k8s.io namespace):
$ kubectl run sample-nginx-k8s --image=sample-nginx-k8s:latest --port=80 --image-pull-policy='Never'
Now we can access it … right? Well … no 😕. Why? Well if you get the status of the pods using the -o wide flag mentioned earlier …
$ kubectl get pods -o wide
… you can now see each one’s IP. Great! We can use that IP in the browser. Except … we can’t. That’s a private IP. It’s only accessible within the cluster. I’m outside of it. That IP needs to be exposed. There is an --expose flag. Could that work?
I’ll delete my prior pod.
And then I’ll try that the run command again, this time with the --expose=true flag:
$ kubectl run sample-nginx-k8s --image=sample-nginx-k8s:latest --expose=true --port=80 --image-pull-policy='Never'
pod/sample-nginx-k8s created
service/sample-nginx-k8s created
Notice the additional output? That’s a service being created too.
So … now we can access the pod using that service’s IP? No. If you look at the details of the service just created using kubectl describe:
kubectl describe service sample-nginx-k8s
...
Type:              ClusterIP
IP:                1.2.3.4
...
… you will again see an IP. But you can’t use that IP either. That’s because the default service created by adding the --expose=true flag uses a ClusterIP. To access the pod from outside the cluster I need something else. An Ingress would normally be what you’d use. But to avoid complicating things with yet another Kubernetes resource here, I’ll instead use a service of type NodePort. Rather than the default of CluserIP we have now.
To save deleting the pod and service yet again, I’ll simply make a new pod with a new name. Then I’ll expose that pod. This time I will specify that new service should be a NodePort. We can access that from outside the cluster. And I’ll use port 8080 to avoid any issue with privileged ports (those under 1024):
kubectl run sample-nginx-k8s-pod --image=sample-nginx-k8s:latest --port=80 --image-pull-policy='Never'
pod/sample-nginx-k8s-pod created
kubectl expose pod sample-nginx-k8s-pod --port=8080 --target-port=80 --name=sample-nginx-k8s-new-svc --type='NodePort'
service/sample-nginx-k8s-new-svc exposed
Now the pod should be exposed. To access it in my browser I’ll need to know the IP of the node and that just-assigned port:
a) I can get the Node IP using:
$ kubectl get nodes -o wide
... STATUS   VERSION        INTERNAL-IP     OS-IMAGE
... Ready    v1.25.4+k3s1   1.2.3.4         Alpine Linux v3.16
There is one node here. You can see a column called INTERNAL-IP. For example 1.2.3.4.
b) I can get the Node Port the newly created service has been assigned using:
$ kubectl get svc sample-nginx-k8s-new-svc
NAME                       TYPE       PORT(S)          AGE
sample-nginx-k8s-new-svc   NodePort   8080:30274/TCP   10m
Combine the node’s IP, a colon, and the node port the pod is exposed on. For example from the values above that would be: http://1.2.3.4::30274.
Load that in a browser … and …

It works! That is our custom index.html file, served by nginx, from the Kubernetes cluster 🚀.
But doing it this way (with imperative commands) makes it much harder to keep track of changes. There’s no audit trail. So in the next post I’ll try using declarative configuration in Kubernetes. That’s the recommended approach for production applications. Plus I’ll add an Ingress resource. That provides much more control over routing HTTP and HTTPS requests (by path and/or hostname) and terminate SSL connections.